This is the third part of the three-part series of my blog where I detail the steps to build a Power Virtual Agent bot and use a Power Automate flow to extend the abilities of the bot. In this part we will look at the details about how to publish Power Virtual Agent bot to a custom website.
- Part 1 : Build a simple Power Virtual Agent bot
- Part 2 : Integrate Power Automate with the Power Virtual Agent bot
- Part 3 : Publish Power Virtual Agent bot to a custom website
We will publish the bot was developed as a part of our exercise in part 1 and part 2 of this series to a custom WordPress website.
There are two options present :
Publish power virtual agent bot to a custom website using the iFrame option present in the publish to custom website option. This doesn’t give you the flexibility to customize the chat canvas.
Second option is to use JavaScript (based on Bot Famework Webchat) to embed the bot to your website. This method uses the Bot Framework Direct Line Channel to connect the bot the website. We will use this option here to publish our bot to a custom WordPress website.
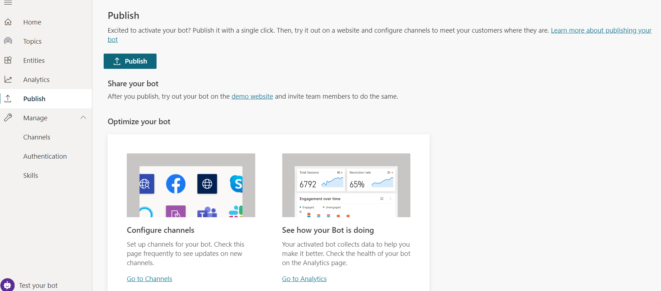
Regardless of which option you use, You will have to first Publish your bot.
Go to the Publish section of the portal and click on the Publish button.
In your WordPress website, you can either edit the theme file or use a plugin to insert scripts to all pages of your website. I have used a plugin to add the following script / html to the website.
<div id="webchat" role="main"></div> The div ‘webchat’ is the placeholder for the canvas that will be rendered by the following JS
<script src="https://cdn.botframework.com/botframework-webchat/latest/webchat.js"></script>

  <script>
        const styleOptions = {

           // Add styleOptions to customize Web Chat canvas
           hideUploadButton: true
        };

        // Add your BOT ID below
        var BOT_ID = "<ENTER YOUR BOT ID>";
        var theURL = "https://powerva.microsoft.com/api/botmanagement/v1/directline/directlinetoken?botId=" + BOT_ID;

      fetch(theURL)
            .then(response => response.json())
            .then(conversationInfo => {
                window.WebChat.renderWebChat(
                    {
                        directLine: window.WebChat.createDirectLine({
                            token: conversationInfo.token,
                        }),
                        styleOptions
                    },
                    document.getElementById('webchat')
                );
            })
            .catch(err => console.error("An error occurred: " + err));

    </script>
Replace the ‘Bot ID’ with your bot’s Id that you can obtain from the Power Virtual Agent portal. Navigate to Channels. Select a channel like “Skype”. Copy the Bot ID that was displayed.
The code above uses the bot id to get a direct line token for the conversation.
Note : In a production setup, this token should ideally be obtained in a secure manner by implementing web channel security.
You can use the JavaScript styleOptions options in the code above to configure a number of pre-defined styles. (Most of them are self-explanatory)
Some settings that you can consider are :
        {
          botAvatarImage:"<url to the image for your bot's avatar",
          userAvatarInitials: "ME",
          userAvatarBackgroundColor: "Grey",
          bubbleBackground: "#BFFBCF",
          bubbleFromUserBackground: "#FEF8D4",
          bubbleBorderRadius: 15,
          bubbleFromUserBorderRadius: 15,
          bubbleFromUserBorderColor: "#FEF8D4",
          bubbleBorderColor: "#BFFBCF",
          bubbleNubSize: 10,
          bubbleFromUserNubSize: 10,
          bubbleFromUserNubOffset: "top",
          bubbleNubOffset: "top",
          suggestedActionLayout: "stacked",
          suggestedActionBorderRadius: 10
        }
The defaultStyleOptions.js file contains the full list of all settings that you can modify.
The bot that I have published on this site is a Power Virtual agent bot published using the same option as explained in this blog post. Feel free to play around with this until my PVA trial version gets expired 😉


How do you get it to stick to the bottom corner of the page and in front of the other website elements like we see most chatbots are placed on websites.